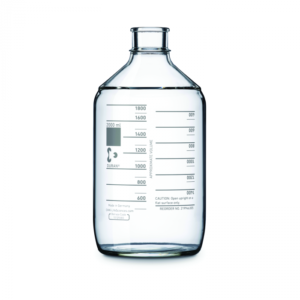
In general, improper calibration and use are the main causes of errors. Careful operation in this correct way can minimize the operational error and achieve the highest accuracy.
1. Temperature of the measuring device
The capacity of the gauge changes with temperature. The temperature at which the gauge is metered in or out of its nominal capacity is the standard temperature.
The glass of the measuring device has a body thermal expansion coefficient in the range of about 10×10-6~30×10-5K-1. A bulk thermal expansion system with a effectiveness of 30×10-6K-1 (made of soda-lime glass) is calibrated at 20 ° C, while using at 27 ° C shows only 0.02% additional error, which is smaller than most gauges Limit error, it can be seen that the standard temperature is not important in actual use, but in order to provide a good calibration reference, it is important to specify a standard temperature and balance the gauge at that temperature before calibration.
2. The temperature of the liquid
The accuracy of measuring the temperature of the calibrator water should be ±0.1 °C. When using the gauge, ensure that all liquids should be at the same room temperature when measuring their volume.
3. Cleanliness of the glass surface
The meter is related to the cleanliness of the inner surface when measuring or measuring the volume of the liquid. The poor cleanliness may cause the meniscus to be deformed and cause errors.
There are two kinds of defects in the meniscus. The glass surface is not completely wet, ie the liquid surface is in contact with the glass at a significant angle, rather than forming a curve tangent to the glass surface.
The surface tension is reduced due to contamination of the liquid surface, and the radius of curvature is increased. The measuring device for measuring the liquid, if the inner wall is not clean, the liquid film on the inner wall may be irregular or incompletely distributed to cause an error. If there is chemical contamination, even if it does not affect the capacity, it may cause errors due to changes in concentration due to chemical reactions. Containers with a grinder should pay special attention to the cleaning of the grinding zone.
To determine if the gauge is thoroughly cleaned, it should be observed during filling (the metering gauge is preferably filled from below the liquid level, ie from the lower part of the plug valve of the burette or from the flow port of the pipette) The meniscus rises without deformation (ie, does not wrinkle at its edges).
After the liquid filling exceeds the nominal capacity, the excess liquid should be discharged (the metering device should be drained through the fluid port, and the metering device should be sucked out using the pipette). The upper glass surface should be kept evenly moist, and the meniscus should not wrinkle at the edges.
4. Setting of meniscus
The meniscus refers to the interface between the liquid and the air of the volume to be tested.
Most gauges can use a control baseline or index line to set and read the meniscus. The meniscus should be set like this:
The lowest point of the meniscus should be tangent to the horizontal plane at the edge of the index line, and the line of sight should be on the same level as the edge of the index line. However, the mercury meniscus should be tangent to the lower edge of the index line. When using an opaque liquid, the horizontal line of sight should pass through the upper edge of the meniscus and should be properly calibrated if necessary. (see photo)

Properly arranging the light can make the meniscus dull and clear, so that it should be lined with a white background and cover unwanted stray light. For example, a black paper strip can be placed at a position of no more than 1 mm below the gauge liquid level or a small length of black thick rubber hose can be hooped on the wall of the gauge.
When the length of the indexing line is sufficient for simultaneous observation from the front and rear of the measuring device, the line of sight should be at a position where the front and rear portions of the upper edge coincide, and parallax can be avoided.
The gauge only uses the black shading band to adjust the edge of the index line when the front has a dividing line. The parallax can be neglected, but it should also be noted that the eye should read in the same horizontal plane as the edge of the index line.
5. Outflow time
For the metering type measuring device, the capacity measured by the liquid film left on the inner wall of the measuring device is always smaller than the capacity to be measured. The volume of the liquid film is related to the time the liquid flows out.
When the outflow time exceeds a certain value, the capacity of the remaining liquid film is extremely small and constant, and therefore, the influence of measuring the liquid capacity error is negligible.
The outflow time is divided into segments and has a certain waiting time to achieve the same effect. When the flow port is broken or blocked, and any change in the size of the flow port to increase the flow rate will cause reading errors. This error reduces the accuracy of the reading and cannot be estimated.
The outflow time is suitable for measuring the glass gauge with water as the liquid. There will be no unreasonable difference in capacity when the actual outflow time varies within this range, but for safety reasons, the outflow time range should be specified. The outflow time can still be marked on the A-stage burette and the pipette, and the user can check whether the flow port is blocked or damaged by measuring the outflow time.


